Showing posts with label Virtualization. Show all posts
Showing posts with label Virtualization. Show all posts
Monday, December 16, 2019
Installing Parrot Security OS in VirtualBox
December 16, 2019
Parrot OS: Parrot OS is one of the best network penetration OS. It is a free and open-source GNU/Linux distribution based on Debian with a focus on Security, Privacy, and Development.
For more information click here
Let us see how to install it in a Virtual Machine...
Before we begin we need to have two things
1. VirtualBox (Extension Pack also)
2. Parrot OS iso file.
*In this article we are going to use the Parrot OS Security version. If you want, you can also use the Home/Workstation version
Creating the Virtual Machine
Open your VirtualBox application, click on the New button. You need to specify three things here name, type, and version of your virtual machine.
1. Name - You can choose any name (EX: Parrot Security OS)
2. Type - Linux
3. Version - Debian (64 bit)
Click on Next, here you need to specify the memory amount which is going to use by your virtual machine. 2 GB is recommended if you have more system memory you can give up to 4 GB or more
Click on Next you will find Create a virtual hard disk now option is selected by default, leave it as it is and click on Create.
Hard disk file type - VDI (VirtualBox Disk Image) [leave it default] --> Click on Next
Storage on physical hard disk - Dynamically allocated. [leave it default] --> Click on Next
Now choose the storage size, which you want to give to this virtual machine. 25 GB is fine. If you want you can give more according to your needs and click on Create.
Virtual Machine created successfully, now we have to change a few settings of this virtual machine.
Settings
Select your virtual machine and click on the Settings button (located right side of the New button).
A settings dialog box will open. You will find several settings here, we are going to change some of these.
1. System - Come to the Processor tab and select the CPU cores for the virtual machine. I have 4 core CPU so, I gave up to 2 cores to my virtual machine.
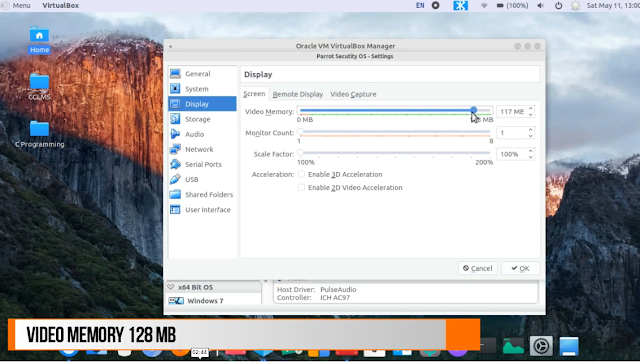
2. Display - Select any amount of video memory up to 128 MB
3. Storage - Select the Empty disc icon (Under the Controller: IDE) from the left panel and select the Optical Drive from the right panel and browse the Parrot OS iso file. Select the iso file, click on OK and finally press the OK button once again to close the settings window.
Our settings are completed now time to come to install the OS.
Installation
Select your virtual machine and click on Start.
(*Use UP, DOWN, LEFT, RIGHT arrow keys to navigate between the menus)
1. In the first window, select Install and press the Enter key
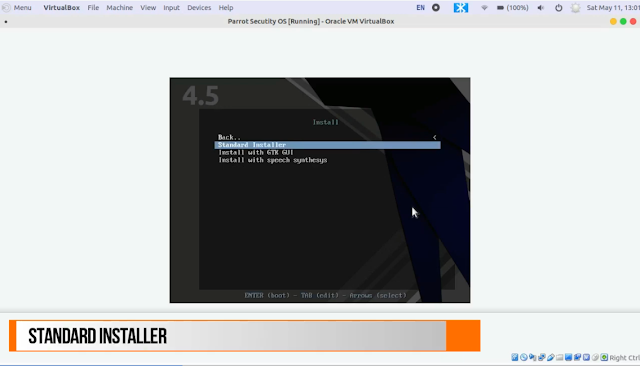
2. Next, choose Standard Installer, If you want you can choose to Install with GTK GUI. In the installation process, I will go with Standard Installer.
3. Choose your native language from the language window and press enter key.
4. From the next window select your location
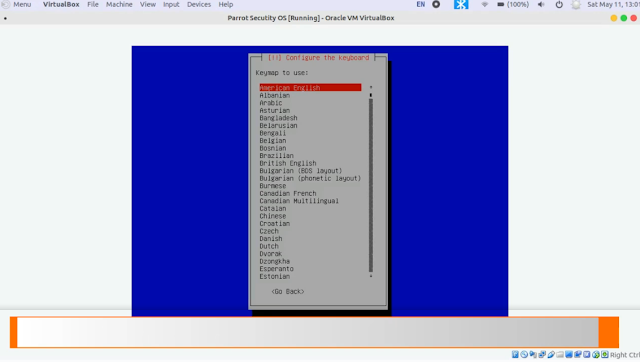
5. Select your keyboard layout
6. Now, you need to set up the admin (root) password. (Mix upper and lower case with numbers to make a strong password)
7. Input your password once again to verify it.
8. Now Input your admin account name. In the next window choose the user account name (you can use the same name for admin and user)
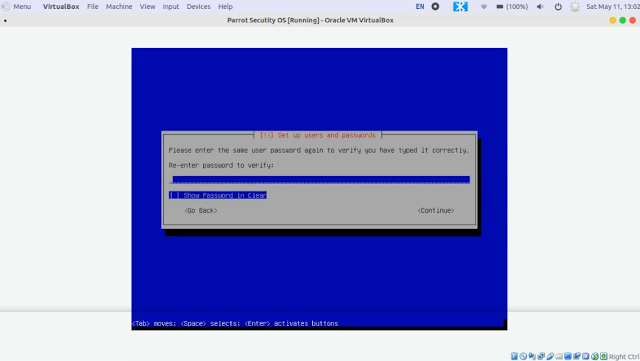
9. Now choose the user account password and verify it.
10. After that, select Guided - use entire disk option from Partition disks window
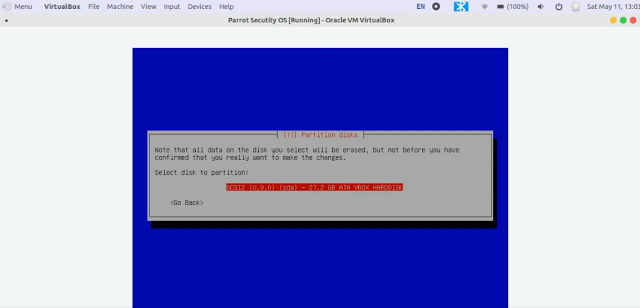
11. There is only one option in the next window, so select it and press the enter key
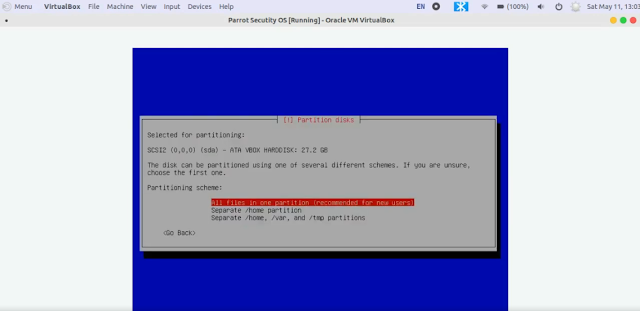
12. Select All files in one partition (recommended for new users) [Selected by default]
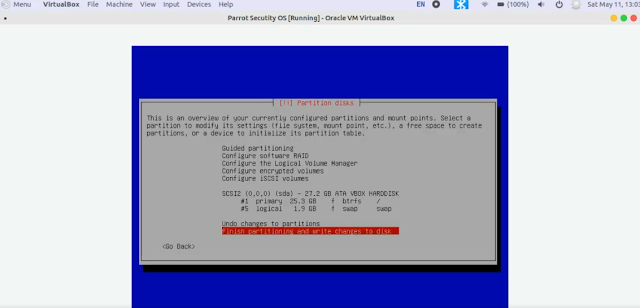
13. Select Finish partitioning and write changes to disk [Selected by default]
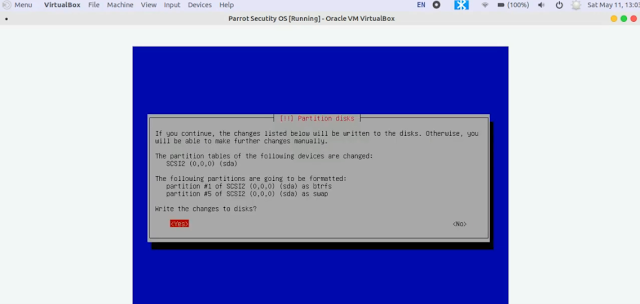
14. Now use left arrow key and select Yes to accept to write changes to the disk.
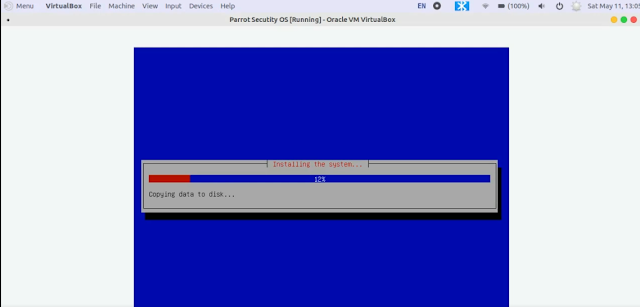
Finally, Installation begins (It takes 10-30 min according to your system specification)
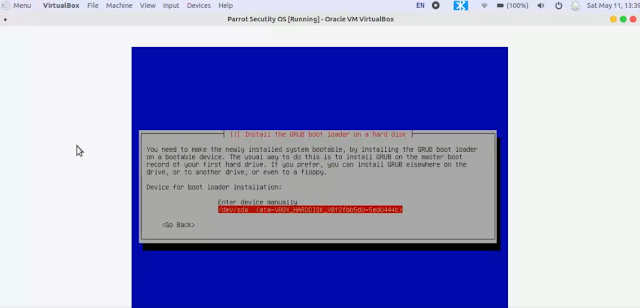
15. When the installer asks select Yes to install the GRUB boot loader to the master boot record. [Selected by default]
16. Select /dev/sda (Second option)
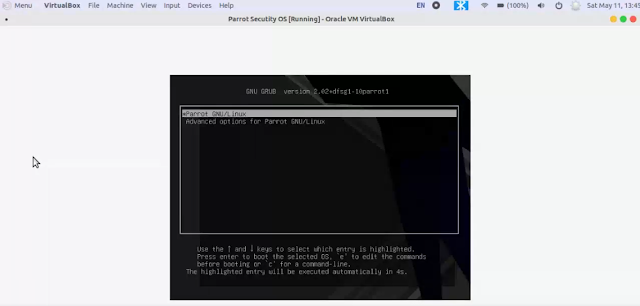
17. Select *Parrot GNU/Linux to start the virtual OS
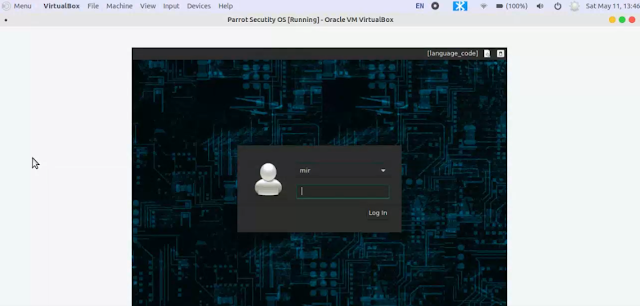
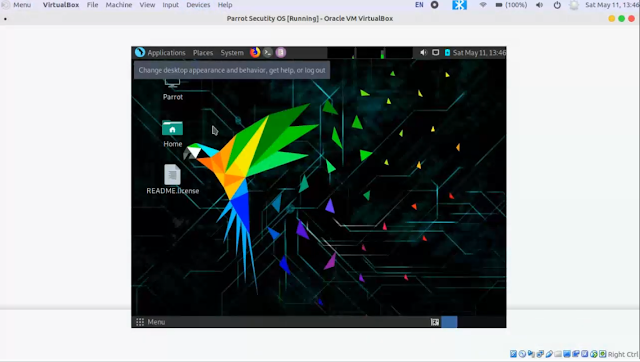
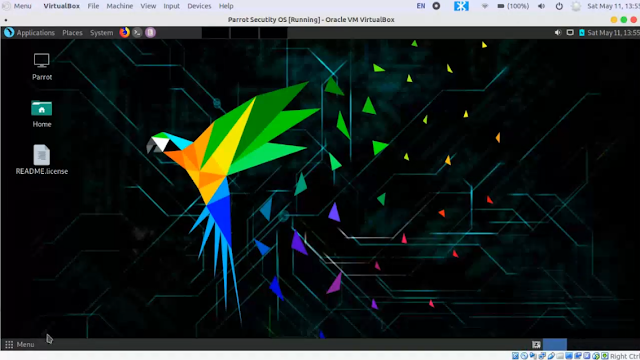
Congrats you successfully installed Parrot Os in your VirtualBox
Use your account password to log in the system
To create a shared folder and full screen your virtual machine read... Shared Folder Between Host and Linux Guest Machine
Monday, October 14, 2019
Shared Folder Between Host and Linux Guest Machine
October 14, 2019
What is a Shared Folder?
A shared folder is a special type of folder which is used to share a file, documents between your host and Virtual PC
How to create a Shared Folder?
Step 1
Extensions Pack
1. Check if you already installed an extension pack or not?
Steps Open VirtualBox ---> Click on File menu ---> Preferences (Ctrl+G) ---> Extensions tab
If you don't find any installed extension pack, go to the VirtualBox download page (https://www.virtualbox.org/wiki/Downloads) and look for Oracle VM VirtualBox Extension Pack, download and installed it. (* Extension Pack must be the same version of your VirtualBox) [If you don't know what is your's VirtualBox version, just click on Help menu ---> About VirtualBox]
I hope you installed VirtualBox Extension Pack successfully.
Step 2
Guest Addition
I. Start your Virtual Machine
II. Click on Devices ---> Insert Guest Addition CD image
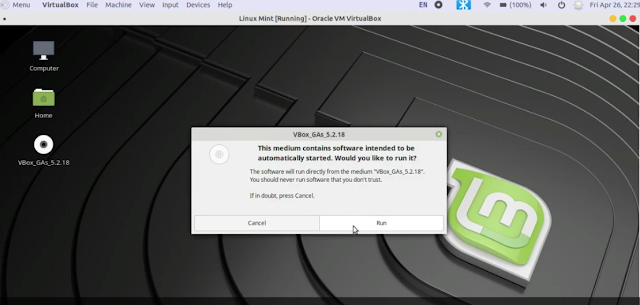
III. After that, you will see Guest Addition dialog box
IV. Click on Run to start installing VirtualBox Guest Addition
At last, run the command sh ./VBoxLinuxAdditions.run to start installing VirtualBox Guest Addition
Now reboot your Virtual Machine.
Step 3
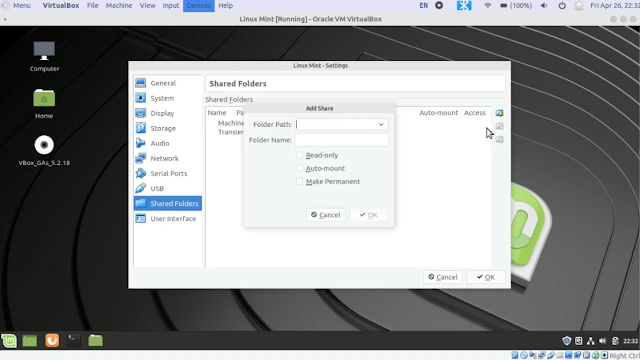
Start your Virtual Machine ---> Click on Devices menu ---> Shared Folders ---> Shared Folder Settings
Now click on Add Folder icon
Now reboot again your Virtual Machine.
A shared folder is a special type of folder which is used to share a file, documents between your host and Virtual PC
How to create a Shared Folder?
Step 1
Extensions Pack
1. Check if you already installed an extension pack or not?
Steps Open VirtualBox ---> Click on File menu ---> Preferences (Ctrl+G) ---> Extensions tab
If you don't find any installed extension pack, go to the VirtualBox download page (https://www.virtualbox.org/wiki/Downloads) and look for Oracle VM VirtualBox Extension Pack, download and installed it. (* Extension Pack must be the same version of your VirtualBox) [If you don't know what is your's VirtualBox version, just click on Help menu ---> About VirtualBox]
I hope you installed VirtualBox Extension Pack successfully.
Step 2
Guest Addition
I. Start your Virtual Machine
II. Click on Devices ---> Insert Guest Addition CD image
III. After that, you will see Guest Addition dialog box
IV. Click on Run to start installing VirtualBox Guest Addition
V. Enter your account password and click on Authentication
[Alternative] In case if you don't see Guest Addition dialog box, double click on VirtualBox Guest Addition CD image icon.
After that, you will see the cdrom0 folder opened. Right-click in that folder and choose Open In Terminal.
Type in the terminal sudo su and enter your account password. Use the ls command to show all files of the cdrom0 folder.
After that, type chmod +x VBoxLinuxAdditions.run command to change the permission of VBoxLinuxAdditions.run file.At last, run the command sh ./VBoxLinuxAdditions.run to start installing VirtualBox Guest Addition
Now reboot your Virtual Machine.
Step 3
Start your Virtual Machine ---> Click on Devices menu ---> Shared Folders ---> Shared Folder Settings
Now click on Add Folder icon
Choose your Folder Path, Folder Name will be automatically selected. Put the checkmark on Auto-mount and Make-Permanent. Click on the OK button.
Now reboot again your Virtual Machine.
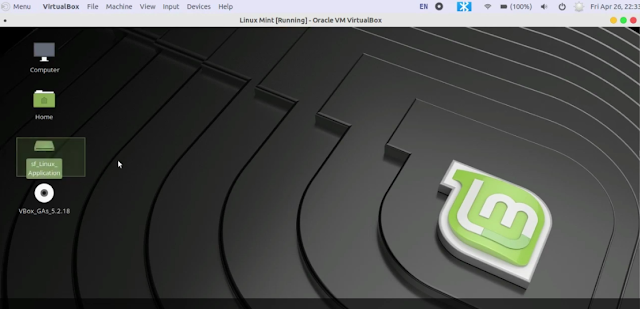
After reboot, you will find the Shared Folder on your desktop.
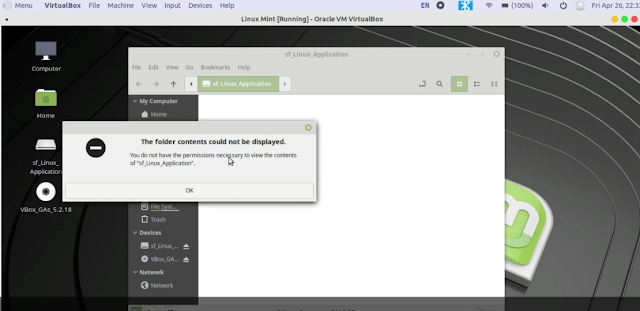
* In case if you are unable to access the content of your Shared Folder, try those following steps.
Open your Terminal. Type sudo su then enter your password.
Write the following commands sudo usermod -a -G vboxsf mir (* Instead of mir use your account name)
sudo chown -R your_account_name:users /media/your_share_folder_name/
Example sudo chown -R mir:users /media/sf_Linux_Application/
Now reboot your Virtual Machine and check the Shared Folder.
Saturday, October 12, 2019
VirtualBox can't find USB devices in Linux host
October 12, 2019
This is the common problem I have seen in almost every Linux distros (especially Debian based distros. Such as Linux Mint, Ubuntu, POP OS, etc), that VirtualBox unable to find USB devices connected to the host OS, even you installed the VirtualBox Extension Pack.
What are the needs to have USB support for Virtual Machines?
1. Data Transfer - Suppose you want to create a backup of your Virtual Machine, or just want to transfer data from your Pen drive to Virtual Machine, in that case, you must have an active USB connection.
2. Wifi Adapters - If you want to connect your USB dongles, Wifi adapter to your Virtual Machines, you need USB support.
How to enable USB support for your Virtual Machines?
Solution 1
Extensions Pack
1. Check if you already installed an extension pack or not?
Steps Open VirtualBox ---> Click on File menu ---> Preferences (Ctrl+G) ---> Extensions tab
If you don't find any installed extension pack, go to the VirtualBox download page (https://www.virtualbox.org/wiki/Downloads) and look for Oracle VM VirtualBox Extension Pack, download and installed it. (* Extension Pack must be the same version of your VirtualBox) [If you don't know what is your's VirtualBox version, just click on Help menu ---> About VirtualBox]
I hope you installed VirtualBox Extension Pack successfully.

* If you don't find any active USB list, follow the Solution 2
Solution 2
Add user to the vboxusers group
1. Open your terminal, type sudo su and enter your account password.
2. Type the following command sudo usermod -aG vboxusers mir (*In the last command, instead of mir
3. Finally, reboot your PC and check the USB settings again.
Subscribe to:
Comments (Atom)

