What is a Shared Folder?
A shared folder is a special type of folder which is used to share a file, documents between your host and Virtual PC
How to create a Shared Folder?
Step 1
Extensions Pack
1. Check if you already installed an extension pack or not?
Steps Open VirtualBox ---> Click on File menu ---> Preferences (Ctrl+G) ---> Extensions tab
If you don't find any installed extension pack, go to the VirtualBox download page (https://www.virtualbox.org/wiki/Downloads) and look for Oracle VM VirtualBox Extension Pack, download and installed it. (* Extension Pack must be the same version of your VirtualBox) [If you don't know what is your's VirtualBox version, just click on Help menu ---> About VirtualBox]
I hope you installed VirtualBox Extension Pack successfully.
Step 2
Guest Addition
I. Start your Virtual Machine
II. Click on Devices ---> Insert Guest Addition CD image
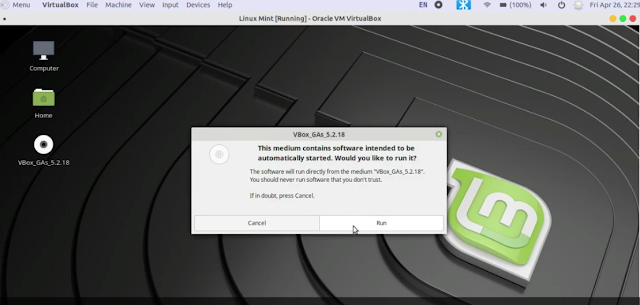
III. After that, you will see Guest Addition dialog box
IV. Click on Run to start installing VirtualBox Guest Addition
At last, run the command sh ./VBoxLinuxAdditions.run to start installing VirtualBox Guest Addition
Now reboot your Virtual Machine.
Step 3
Start your Virtual Machine ---> Click on Devices menu ---> Shared Folders ---> Shared Folder Settings
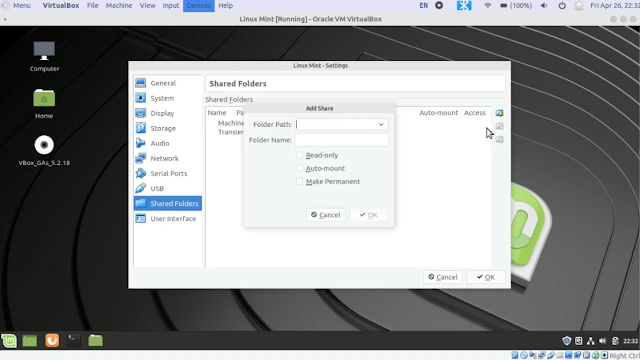
Now click on Add Folder icon
Now reboot again your Virtual Machine.
Virtualization
A shared folder is a special type of folder which is used to share a file, documents between your host and Virtual PC
How to create a Shared Folder?
Step 1
Extensions Pack
1. Check if you already installed an extension pack or not?
Steps Open VirtualBox ---> Click on File menu ---> Preferences (Ctrl+G) ---> Extensions tab
If you don't find any installed extension pack, go to the VirtualBox download page (https://www.virtualbox.org/wiki/Downloads) and look for Oracle VM VirtualBox Extension Pack, download and installed it. (* Extension Pack must be the same version of your VirtualBox) [If you don't know what is your's VirtualBox version, just click on Help menu ---> About VirtualBox]
I hope you installed VirtualBox Extension Pack successfully.
Step 2
Guest Addition
I. Start your Virtual Machine
II. Click on Devices ---> Insert Guest Addition CD image
III. After that, you will see Guest Addition dialog box
IV. Click on Run to start installing VirtualBox Guest Addition
V. Enter your account password and click on Authentication
[Alternative] In case if you don't see Guest Addition dialog box, double click on VirtualBox Guest Addition CD image icon.
After that, you will see the cdrom0 folder opened. Right-click in that folder and choose Open In Terminal.
Type in the terminal sudo su and enter your account password. Use the ls command to show all files of the cdrom0 folder.
After that, type chmod +x VBoxLinuxAdditions.run command to change the permission of VBoxLinuxAdditions.run file.At last, run the command sh ./VBoxLinuxAdditions.run to start installing VirtualBox Guest Addition
Now reboot your Virtual Machine.
Step 3
Start your Virtual Machine ---> Click on Devices menu ---> Shared Folders ---> Shared Folder Settings
Now click on Add Folder icon
Choose your Folder Path, Folder Name will be automatically selected. Put the checkmark on Auto-mount and Make-Permanent. Click on the OK button.
Now reboot again your Virtual Machine.
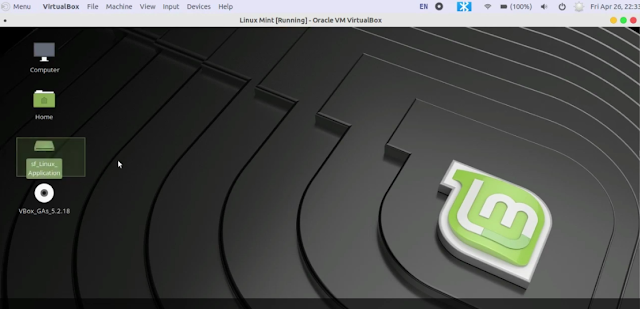
After reboot, you will find the Shared Folder on your desktop.
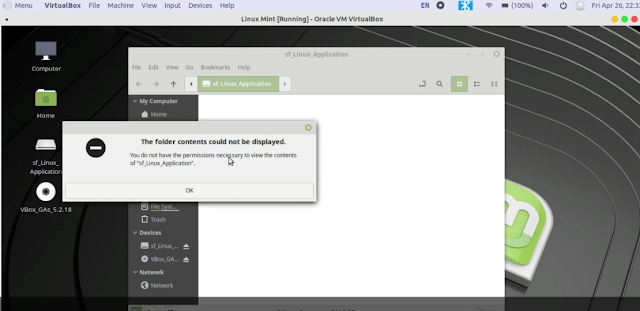
* In case if you are unable to access the content of your Shared Folder, try those following steps.
Open your Terminal. Type sudo su then enter your password.
Write the following commands sudo usermod -a -G vboxsf mir (* Instead of mir use your account name)
sudo chown -R your_account_name:users /media/your_share_folder_name/
Example sudo chown -R mir:users /media/sf_Linux_Application/
Now reboot your Virtual Machine and check the Shared Folder.








No comments:
Post a Comment